PimPrint for Pimcore Installation
Prerequisites
The following guide assumes you have a running Pimcore 12.x installation. To install Pimcore, please visit the Pimcore Getting Started documentation.
For other Pimcore versions, please refer to the Supported Pimcore Versions section.
Installing PimPrint into Pimcore 12
Install MdsPimPrintCoreBundle into your Pimcore by issuing:
composer require mds-agenturgruppe/pimprint-core-bundle:^5.0
Enable MdsPimPrintCoreBundle in config/bundles.php:
MdsPimPrintCoreBundle::class => ['all' => true],
PimPrint needs a Symfony security firewall for handling the user authentication process.
Add the firewall configuration right after pimcore_admin in the firewall section of your config/packages/security.yaml file.
pimprint_api: '%mds.pimprint.core.firewall_settings%'
To automatically add the firewall configuration by the installer issue:
bin/console pimcore:bundle:install MdsPimPrintCoreBundle -n
Attention:
Do not be surprised that yoursecurity.yamllooks ugly after automatic installation!
\Symfony\Component\Yaml\Yaml::dump()sometimes creates ugly files.We recommend adding the firewall configuration manually to your
security.yaml.
Installing PimPrint InDesign-Plugin
The InDesign plugin provided by mds as an CEP-Extension ZXP-File. Please email info@mds.eu to get the plugin and further information.
For easy installation of the ZXP-File, we recommend Anastasiy’s Extension Manager available for Mac and Windows platforms.
Install the extension manager, launch it and choose the mds.pimprint.v2.indesign.plugin-2.x.x.zxp extension file to install.
Connecting the InDesign-Plugin with Pimcore
Start InDesign and open the mds.PimPrint Plugin from the InDesign main menu.
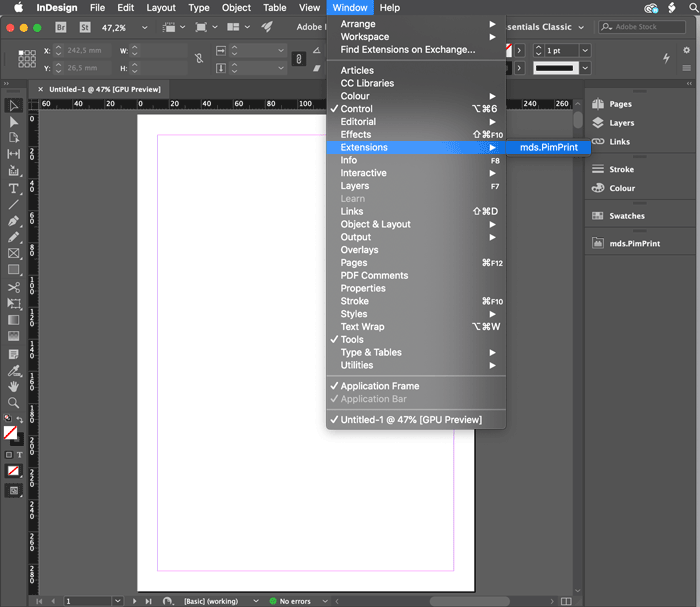
The first time the plugin is started, a server connection must be configured.
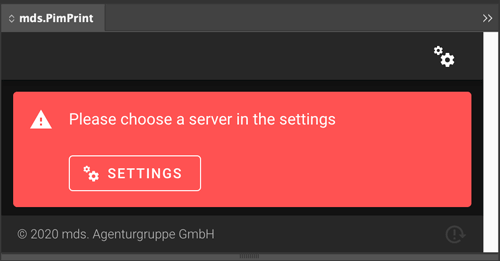
Click on the Settings button to open the plugin settings pane. Please refer to the Server connection page to learn how to configure a server connection.